The Forensic Diagnosis: Why Your Heat Is Ghosting You
You hear it every winter. That rhythmic clicking—the sound of a gas valve trying to do its job and failing. It is 2:00 AM in the middle of a January cold snap where the mercury has crawled into the basement, and your furnace is short-cycling like a heart with an arrhythmia. As a tech who has spent three decades dragging my tools through crawlspaces that would make a claustrophobic man weep, I can tell you exactly what is happening. Your thermocouple, that tiny copper-clad rod sitting in the pilot flame, has decided to retire. Most homeowners panic and call a ‘Sales Tech’—the kind of guy who shows up in a clean uniform with more hair gel than brain cells. I followed one of these guys last week. He had quoted a homeowner six grand for a full system swap because of a ‘cracked heat exchanger’ that didn’t exist. The real culprit? A soot-coated thermocouple that cost less than a decent pizza. He was trying to sell a new unit when all she needed was a thermocouple replacement and a dose of honesty. If you want to avoid the scam, you need to understand the physics of the Seebeck effect. This little component isn’t just a stick of metal; it’s a thermoelectric generator. It converts the thermal energy of the pilot flame into millivolts of electricity to keep that gas valve open. No millivolts, no gas. It is a safety system designed to keep your house from becoming a crater in the neighborhood. Before you sign a five-figure contract, let’s look at how to fix this ourselves.
“The most expensive equipment in the world cannot overcome a bad duct system.” – Industry Axiom
The Physics of the Pilot: Why It Fails in the Cold
In the frozen North, furnaces run high-duty cycles. This constant heat stresses every component, especially the limit switch and the thermocouple. When the limit switch replacement becomes necessary, it’s often because the furnace is overheating due to poor airflow—likely because some ‘tin knocker’ thirty years ago didn’t size the return air drop correctly. But when the pilot won’t stay lit, it’s almost always the thermocouple. Over time, the constant bath of flame causes oxidation. Carbon deposits build up on the tip, acting as an insulator. This prevents the heat from reaching the bimetallic junction inside, stopping the flow of ‘juice’ to the solenoid. This is the ‘Forensic Diagnosis’ of a failing heating system. You might think you need geothermal heat pump systems or some high-tech geofencing temperature control to stay warm, but if the core mechanical safety fails, all the fancy tech in the world is just expensive wall art. Proper preventative maintenance contracts usually catch these issues before they leave you shivering, but if you’re reading this now, it’s probably already too late for the easy way out. You need the hands-on fix.
Step 1: Isolate the Juice and the Gas
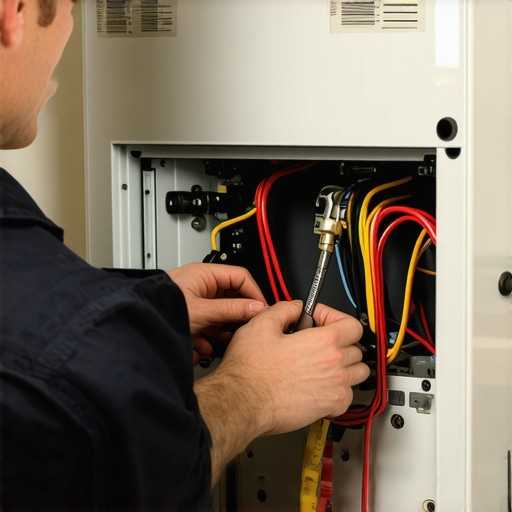
Safety isn’t a suggestion; it’s the difference between a job well done and a trip to the burn ward. Before you even touch the burner assembly, you must shut off the electrical power (the juice) and the gas supply. A furnace is a controlled explosion; respect it. Check your contactor repair needs while you are in there—look for pitted points or signs of arcing. If you are working on shop heater services or large-scale garage heaters, the components might be more rugged, but the logic remains the same. Once the power is off, you’ll need to remove the burner access cover. This is where the sensory experience of HVAC really hits you. You’ll smell the faint metallic scent of hot steel and perhaps the acidic tang of a bypass humidifier repair gone wrong where water has been leaking into the heat exchanger. If you see signs of ‘flame rollout’—black soot on the exterior of the cabinet—stop immediately. That’s a cracked heat exchanger, and no thermocouple will save you from carbon monoxide poisoning. If things look clean, proceed to unscrew the thermocouple lead from the gas valve using a 7/16-inch open-end wrench.
Step 2: The Removal of the Failed Sentry
Once the lead is disconnected from the valve, you have to unclip the probe from the pilot burner assembly. This is often the hardest part because years of heat cycles have basically welded the metal together. Use a bit of penetrating oil if you have to, but don’t get it on the burner head. This is a good time to check your HVAC maintenance plans; a tech worth his salt would have cleaned this last fall. If you are dealing with portable heater safety checks, you’ll notice they use similar technology, though often in a more compact ‘tip-over’ switch format. As you pull the old thermocouple out, look at the tip. Is it burnt through? Is it covered in white ash? That ash is a sign of poor combustion. If you’re lucky, you might just need to scrub it with a wire brush, but for twenty bucks, you might as well put in a new one. Remember, we are aiming for long-term reliability. For more on keeping your unit running, check out top HVAC repair strategies to extend your systems life.
Step 3: Installation and the ‘Sweet Spot’
Slide the new thermocouple into the bracket. It needs to be positioned so the top 1/2 to 1/3 of the tip is engulfed in the pilot flame. If it’s too low, it won’t get hot enough to generate the millivolts needed to hold the valve open. If it’s too high, you’ll burn it out in a month. It’s about that ‘Beer Can Cold’ level of precision, but for heat. Tighten the lead into the gas valve finger-tight, then give it a 1/4 turn with the wrench. Do not over-tighten! You’ll crush the copper lead and short out the internal wire. Once installed, turn the gas back on and light the pilot. You’ll have to hold the knob down for about 60 seconds to allow the thermocouple to heat up and start sending the juice. If the flame stays lit when you release the knob, you’ve won. You just saved yourself a middle-of-the-night emergency call. For those looking at more modern options, like heat pump solutions for efficient home comfort in 2025, you can find more info here: heat pump solutions for efficient home comfort in 2025. However, for a standard gas furnace, this mechanical fix is king.
“Standard 611-P requires that all safety pilots must shut off gas flow within 90 seconds of flame failure.” – HVAC Safety Standards
Beyond the Quick Fix: Real Reliability
While a thermocouple replacement is a common fix, it’s often a symptom of a larger lack of care. If your furnace is constantly blowing through thermocouples or limit switches, your airflow is likely restricted. Check your filters. If they look like a dryer lint trap, you’re killing your blower motor. If you’re struggling with choosing the right technician to look at the bigger picture, read our choosing the best heating service expert tips for 2025. Don’t let a ‘Sales Tech’ bully you into a new system because they are too lazy to do a real diagnosis. HVAC is about physics, not sales scripts. Whether you are dealing with a standard furnace or complex geothermal heat pump systems, the goal is always the same: move heat efficiently and safely. To stay ahead of the curve, always refer to a preventative heating maintenance guide for homeowners in 2025 to ensure you aren’t left in the cold again. Comfort isn’t magic; it’s just thermodynamics under control.